AI Chatbot with React, Next.js -Artificial intelligence has transformed how businesses and developers think about user interaction. Among the most powerful applications are chatbots, which provide real-time, human-like conversations directly within websites and applications. If you’re looking for a React chatbot tutorial that walks you through designing a clean interface, integrating with APIs, and deploying to production, this guide is for you. We’ll cover Next.js chatbot integration, show you how to style a modern React chatbot UI using Tailwind CSS, and connect everything to the Gemini API chatbot backend for intelligent responses.
By the end of this article, you’ll have a fully functional AI chatbot with Next.js, capable of handling natural conversations, scaling efficiently, and delivering a polished user experience.
Why Use React and Next.js for Chatbot Development?
Before diving into code, let’s understand why React chatbot development with Next.js has become the go-to solution for developers:
- React’s component-based architecture— Chatbots require modular UI components like chat bubbles, input fields, and typing indicators. React makes it easy to build reusable parts for a clean and scalable React chatbot UI.
- Next.js performance and API routes—Next.js enhances React with server-side rendering, static optimization, and built-in API routes, which are perfect for connecting your frontend chatbot to an AI backend. When working on a Next.js chatbot integration, this feature is invaluable.
- SEO and deployment simplicity – Since Next.js apps run well on Vercel, deploying a chatbot becomes seamless. This is important when building for production and wanting users to find your chatbot via search.
Together, React and Next.js provide the best combination for building an AI chatbot with Next.js that’s not only functional but also highly optimized for modern use cases.
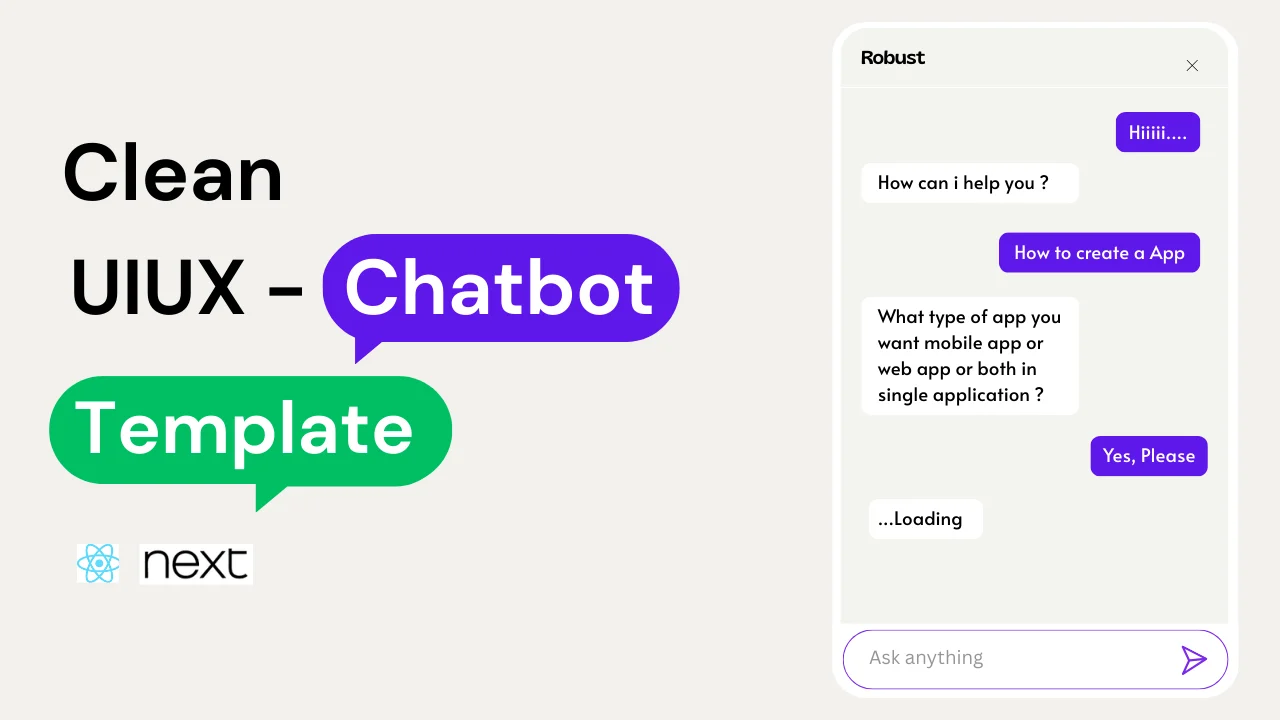
Responsive Chatbot Window with Clean UI/UX—Made with React & Next. js – OLD VERSION Chatbot
Setting Up the Project
Let’s start by creating a fresh project. For this React chatbot tutorial, we’ll use TypeScript, Tailwind CSS for styling, and the latest Next.js version.
AI Chatbot with React, Next.js
npx create-next-app@latest chatbottwo --typescript --tailwindcss
After installation, check your package.json It should contain the following stack: or Install these packages to add more interactions for the chatbot, like Framer Motion.
"dependencies": {
  "clsx": "^2.1.1",
  "next": "15.4.7",
  "react": "19.1.0",
  "react-dom": "19.1.0",
  "react-markdown": "^10.1.0",
  "remark-gfm": "^4.0.1",
  "tailwind-merge": "^3.3.1"
}
This setup ensures you have React 19, Next.js 15, Tailwind CSS, and markdown support. With this, you’re ready to design a clean React chatbot UI.
Don’t forget to add GEMINI_API_KEY=your_api_key_here as the API key and setup
Advanced Features for a Real-Time Chat Experience
A truly interactive chatbot requires more than sending and receiving text. Here are some advanced improvements:
- Streaming responses—Instead of waiting for full responses, stream chunks in real-time to simulate natural typing, creating a “Next.js real-time chatbot.”
- Typing indicator – Show a “Bot is typing…” message for better UX.
- Markdown rendering—used
react-markdownto support code blocks, tables, and links in bot replies. - Multi-language support—Gemini API supports multiple languages, making your AI chatbot with Next.js globally friendly.
By implementing these, your chatbot will feel more natural and professional.
Deployment on Vercel
AI Chatbot with React, Next.js many chatbot templates available in the Vercel template; you can also take referrals from there.
One of the biggest advantages of Next.js chatbot integration is seamless deployment. With Vercel:
- Push your project to GitHub.
- Connect the repository to Vercel.
- Add yours GEMINI_API_KEY as an environment variable in the Vercel dashboard.
- Deploy.
In seconds, your React chatbot tutorial project will be live on a production URL, with all security and scalability handled.
Best Practices for AI Chatbot Development
When building with React, Next.js, and Gemini, keep these best practices in mind:
- Security first: Always keep API keys in server-side routes.
- Optimize for mobile: Ensure your React chatbot UI adapts seamlessly to mobile screens.
- Handle errors gracefully:Provide fallback responses if the API fails.
- Scalability: Consider caching frequent queries to reduce API calls.
- Accessibility: Use proper ARIA roles so the chatbot is usable by everyone.
Conclusion
In this article, we explored a complete React chatbot tutorial, building from scratch with Next.js chatbot integration, styled using Tailwind CSS, and powered by the Gemini API chatbot. We discussed why React and Next.js make an excellent choice for AI chatbots with Next.js, designed a clean React chatbot UI, integrated API routes securely, and explored advanced features like real-time streaming and deployment.
With this foundation, you can take your chatbot further—add voice input, integrate with CRMs, or build domain-specific assistants. Whether you’re a beginner or an experienced developer, now you have the tools to build a chatbot with React and Next.js that’s both intelligent and beautiful.